

This tutorial is my own creation and any similarity to any other tut is merely coincidental.
Please do not copy and paste anywhere else and link back to my blog.
This tut was written by me June 3rd, 2013.
This tutorial was done using Photoshop CS5
Supplies needed are as follows:
Template #6 made by me which you can find HERE
Font used for name: (TBA)
You can find this font HERE for free
Tube of choice is from VeryMany
This gorgeous tube is called Penny. She can be purchased HERE
Mask #30 from Amy & Leah's Gimptastic Tuts - Download HERE
Filters used: Xero Porcelain, Xero Radiance, Tramages-Tow the line & Penta-VTR2
I also used AAA Good Vibrations found HERE
Now let's begin.
Open up the template.
Make sure you hit "select all" and "merge same layers" once on the layers box, then drag the template onto a new canvas of 700x700 just so that you have extra room around your tag. You can resize it smaller to your liking once the tag is complete and then add your CR so that it doesn't come up distorted.
Place your tube on the template to your liking. Now to your tube add the Xero Porcelain filter at the following settings. You can adjust it to your liking if it's too much or not enough.

Now add Radiance filter at the following settings:

Add drop shadow to your tube and now lets work on the template. Make your tube invisible right now by clicking the eye ball on the left side of the layer that she is on. Now go to the Bottom pink rectangle layer and apply the Tramages- Tow the line filter at the following settings:

Add drop shadow to this pink layer at these settings:

on Peach square right, add the following Bevel & Emboss settings:


Now on the Peach circle, apply Penta- VTR in these settings:


On Peach Circle right, apply Bevel and Emboss at the following settings:

Go to Peach Circle left and apply the exact same settings as you did for the right one. This is what your tag should look like after applying all of the setting above.

Now you're going to go inside of the left Peach Circle border and insert a pink colored circle to fill. I used the color #fdcfd5. Now your tag should look like this:

Apply Penta-VTR2 in the same settings we used before and apply AAA Good Vibrations to your new Pink Circle in the setttings you used earlier as well. You shouldn't have to adjust anything. The settings should still be the same for when you used it before. If it's not, scroll above and use the same settings that we used on the peach circle right earlier.
In the black rectangle layer on the layers palette, press Control and click on to the layer. It should now be selected. Go to Select>Modify>Contract in the amount of 15. Create new layer above the black rectangle and fill with the color #e9d1b3. Now you should have this:

All the same size in two color Pink (#fcc4cb) and (#fbdbb4) Peach or whatever scraps/papers you are using, make rectangle using the rectangle shape tool to make 5 or 6 rectangles inside of the peach rectangle you just made above. Merge all of these shape layers together by highlighting them on the layers palette by clicking Control and then click the layers..and then hit Control E to merge. Make sure the new shapes layer, is directly above the peach layer you created on top of the black rectangle. Now go to Layers> Create Clipping Mask. Make sure that all of your merged shape layer fits perfectly inside the peach rectangle. Add a stroke of 2px in the color white to your merged shapes layer.
Now make some duplicate copies of your tube(Pinup) by right clicking the tube layer and choosing duplicate layer. You need to make 4 layers. On these 4 duplicate tube layers, remove the drop shadow on them by unclicking effects on those layers, on the layer's palette. Now insert the face portion of your tubes as show. These pinups are going directly on top of the merged shapes you made earlier. Go to Layers>Create Clipping Mask on all of them and make sure before you do this, that the tube layers are directly above the merged shaped layer. Your tag should look like this now.

Change the blend mode of those tubes you used to Luminosity and now you should have this:

Now place two up close pics of your tube in the two circle above her. Use Edit>Transform>Flip Horizontal to switch her from left to right, or right to left. Change the blend mode to luminosity on the tubes. On both tubes go to Layers>Apply Clipping Mask to both and now the tubes should fit perfectly inside of the circles. Make sure the tubes have the same Porcelain & Radiance settings applied on them as your original tube. Apply Penta-Jeans on the two tube layers that you just added at these settings:
Now make a small rectangle (any color) in the center of your tag and apply these settings to it:


and this is how your tag should look now:

Now go delete the background layer. Make sure one of the remaining layers is selected..and go to Layer>Merge Visible> and you should have everything altogether now without the extra layers.
Make a new layer as the bg layer. Make this the very first layer on the layers palette and use the paint bucket tool and drop the color #f74b4f in. Take Mask #30 and place it underneath or on top of the mask. Uncheck the eyeball on your merged tag, and the new background color layer. Only the mask should be showing right now. Now go to your Layer's palette and click Channels.

Unlike the above pic, make sure the blue line is directly on the Mask before going to Channels. Now click the Channels. Go to the top picture (RGB) of the mask and use your mouse to click inside of the mask. Click the Layers tab, and your mask should now be selected. Uncheck the eyeball on the left of your mask.

Check the eyeball on the left of the background paper. Now press the add Layer Mask button (arrow).

Erase the original mask copy. Apply Penta- VTR2 in these settings:
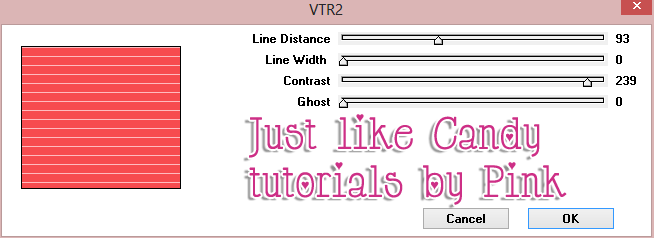
and AAA Good Vibrations to the new mask in these settings:

Check your tag layer and hit Control and click the tag and mask. Then hit Control E to merge. Now your tag is complete. Add your copyright and the name and that's it.

Me encanta. Gracias
ReplyDeleteDe Nada :)
ReplyDelete